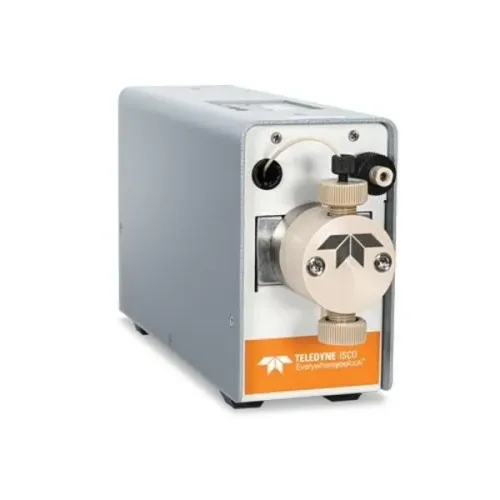

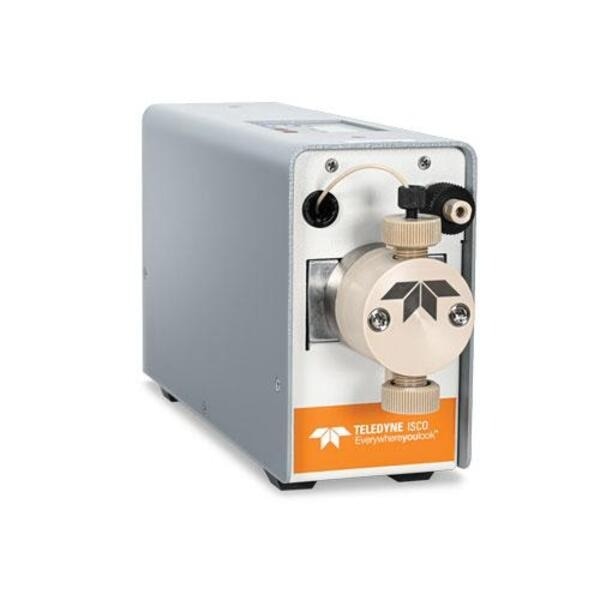
A ReaXus pump will not deliver stable, pressurised flow simply because you have entered a flow rate. You need to connect the fluid path correctly, remove air before applying back pressure, account for piston-driven pulsation, and shut the system down without leaving damaging residues behind. By following the workflow below, you can prepare, start, monitor, and clean the pump with fewer causes of pressure instability and loss of prime.
Key takeaways
- Connect the inlet to the suction side and the outlet to the pressurised line.
- Prime the pump until fluid exits without visible air bubbles.
- Monitor pressure, flow, tubing connections, and valve movement during operation.
- Depressurise fully before flushing, disconnecting, or storing the pump.
How the piston and check valves move liquid
A ReaXus pump moves liquid by filling and emptying a piston chamber on every stroke. The piston does not push a continuous column of fluid; it creates repeated displacement events, and the check valves direct each event through the correct path.
- During the suction stroke, the piston retracts and lowers pressure inside the chamber.
- The inlet check valve opens, allowing solvent or process liquid to enter.
- The outlet check valve remains closed, preventing liquid from returning from the pressurised discharge line.
- During the discharge stroke, the piston advances and raises chamber pressure.
- The inlet valve closes to block backflow into the supply line.
- The outlet valve opens, sending the chamber’s measured volume into the outlet tubing.
This sequence is the basis of ReaXus reciprocating pumps operation and the ReaXus reciprocating pump workflow. Each piston stroke delivers a finite volume, so flow rises and falls rather than remaining perfectly steady. Faster strokes produce more frequent pulses; a larger displacement produces a larger pulse.
Downstream tubing, mixers, accumulators, or other system volume can reduce the visible fluctuation, but they do not remove its source.
Dirty or dried check valves make the pattern worse. Particles, precipitated buffer, or solvent residue can stop a valve sealing, causing backflow, pressure oscillation, poor low-flow accuracy, or loss of prime. Filter mobile phases, prevent precipitation during solvent changes, and flush the pump before shutdown.
How to set up the inlet, outlet, tubing, and fittings
Use a stable, level surface and keep the solvent container close enough to make the inlet line short, straight, and fully submerged. A long or kinked suction line increases restriction and lets air enter during the stroke.
1. Confirm the pump head, inlet port, outlet port, and purge path are identifiable before connecting anything. Do not rely on tubing colour to determine flow direction.
2. Connect the inlet tubing to the inlet port with the correct ferrule and fitting. Place its other end in compatible, filtered, adequately degassed mobile phase; keep the end below the liquid surface and prevent it from resting against container sediment.
3. Connect the outlet tubing to the outlet port and direct it to waste or a suitable low-pressure receptacle. Leave this path open during priming, rather than connecting the pump immediately to a column, reactor, or closed valve.
4. Check that every tube, ferrule, seal, and fitting is chemically compatible with the solvent and rated for the intended pressure. Replace flattened tubing, cracked ferrules, damaged threads, and hardened seals; a suction-side leak can admit air without producing a visible liquid leak.
5. Hand-tighten fittings as specified by the equipment instructions, then inspect each joint for alignment and strain. Do not use excessive force, sealant, or an adaptor that changes the port size without confirming compatibility.
This ReaXus pump setup prevents dry running and gives the pump a low-resistance path for its initial fill. For ReaXus pump fluid handling, Septech Marketing LLP can help verify fitting and tubing choices when solvent composition or connection standards are uncertain.
Related products
 | Pumps The Teledyne ISCO ReaXus Series offers a versatile range of reciprocating pumps designed to meet a wide variety of laboratory and industrial needs. View product → |
 | Pumps Septech introduces a new class of reciprocating pumps designed to deliver liquid CO₂ for supercritical fluid extraction (SFE), supercritical fluid... View product → |
How to prime the pump and remove trapped air
Prime at low flow with the outlet open to waste. Applying pressure to an empty pump head can stop the piston from filling and damage seals or check valves through dry running.
A reliable ReaXus pump setup starts with a compatible, filtered, adequately degassed solvent. Place the inlet tube well below the solvent surface, and inspect the tube, ferrule, and fitting for cracks, loose threads, flattened ends, or incorrect sizing. A suction-side leak can admit air without producing a visible solvent leak.
1. Connect the inlet line to the pump and the outlet line to waste or a low-pressure receptacle. Keep the outlet unrestricted during priming.
2. Open the pump’s purge path, or use the designated priming function. Do not prime against a closed valve.
3. Start the ReaXus reciprocating pump at its lowest practical flow. Watch the inlet tubing, pump head, purge outlet, and waste line for bubbles.
4. Continue until solvent leaves the outlet as a continuous, bubble-free stream. Liquid at the outlet confirms that the pump head and outlet path contain solvent; a damp fitting alone does not.
5. Close the purge path while the pump is running at low flow, then increase flow in small steps. Stop if bubbles return, pressure oscillates, or the pump loses prime.
6. Check every suction connection again before applying process pressure. If air persists, reseat the tubing and fittings, replace damaged tubing or seals, verify the solvent level, and degas the solvent before restarting.
This ReaXus reciprocating pump workflow prevents trapped gas from causing unstable flow, incomplete piston filling, and pressure fluctuations.
How to start, control, and monitor pressurised operation
Start at a low flow after obtaining bubble-free liquid, close the purge path, increase flow gradually, and apply outlet pressure only after the pump runs steadily. Set the pressure limit below the lowest rated value for the pump head, tubing, fittings, column, and downstream vessel.
A pressure limit is protection, not a target: a blocked outlet or clogged column requires stopping and depressurising before you disconnect anything.
| System | Flow and stroke choice | Pressure and run control |
|---|---|---|
| HPLC | Use the validated method flow; choose shorter, faster strokes where the controller permits to reduce ripple. | Watch pressure trend and detector stability; verify flow under the method solvent and back pressure. |
| SFC | Increase flow only after stable liquid delivery and temperature control. | Stay within the pump, tubing, and system ratings; stop on rising pressure or unstable ripple. |
| Extraction or process | Set flow from required residence time and batch volume, then confirm delivered volume. | Define a maximum pressure and stop time before starting; do not run unattended without an alarm response. |
Use adequately degassed, filtered solvent at a stable temperature. Dissolved gas can emerge during the low-pressure part of a stroke, causing incomplete piston filling, pressure fluctuation, and loss of prime. Stable ReaXus pump fluid handling also requires clean check valves; precipitated buffer or particles cause backflow and poor low-flow accuracy.
Monitor actual pressure, flow, temperature, and the run volume rather than trusting the programmed rate alone. Solvent compressibility, viscosity, trapped air, seal wear, and back pressure change delivery. Two phased pump heads reduce pulsation, but a restriction or compressible solvent can still produce pressure ripple.
Stop when the planned volume or residence time is reached, or earlier if pressure crosses the limit.
How to shut down, depressurise, flush, and store the pump
Stop the drive, relieve fluid pressure, and flush before disconnecting any fitting. This sequence protects the check valves and seals from crystallised buffer, trapped solvent, and sudden pressure release.
1. Stop the pump and isolate the downstream system. Open the designated purge or bleed path to a suitable waste vessel, then wait until the pressure gauge reads zero. Never loosen tubing while the fluid path remains pressurised.
2. Place the inlet line in a compatible flush solvent and run at low flow with the purge path open. Collect the discharge until process liquid has cleared. For concentrated buffer, flush with water or a validated aqueous mobile phase before introducing an organic solvent.
3. Check miscibility before changing solvents. If the next solvent is immiscible with the process liquid, use an intermediate solvent that mixes with both; a direct change can leave a plug in the pump head and tubing.
4. Close the purge path after the discharge is clear, then circulate the intended storage solvent through the head and check valves. Do not leave the pump dry unless the equipment instructions specifically require it.
5. Stop flow, cap the inlet and outlet, wipe spills, and record the storage solvent. This shutdown sequence completes the reaxus reciprocating pump workflow and supports reliable reaxus reciprocating pumps operation on the next run.
Frequently asked questions
How does a Reaxus reciprocating pump move liquid?
A piston repeatedly fills and empties a chamber. Check valves open and close to direct each displacement event through the inlet and outlet.
How do you set up a Reaxus pump?
Connect the inlet and outlet tubing to the correct ports, secure compatible fittings, and check every connection before introducing pressure.
How do you prime a Reaxus reciprocating pump?
Fill the fluid path and run the pump at a controlled setting until trapped air leaves the tubing and the outlet stream is free of bubbles.
How should you shut down and store a Reaxus pump?
Stop the drive, isolate the fluid path, release pressure, flush compatible fluid through the pump, drain it, and store it with clean connections protected.